Redcoats on the March to Aberdeen ... and those Barges to Dunbar!
Jenny Haldane's Giving Cope a Chance then ...
Cope's biggest problem, once he'd missed the Highlanders at the Corrieyairack Pass, was that he had to get back to Edinburgh before the Prince got there. He made haste, force marching more than 100 miles from inverness to Aberdeen whilst getting the authorities on the Forth to send as many barges as possible to Aberdeen to carry his army back south again. No mean challenge.
If he could get there quickly enough he could get to Leith and rejoin Generals Guest and Preston in Edinburgh. But if the Prince beat him to the capital it had to be Dunbar.
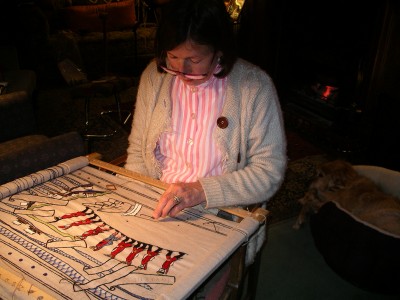
Jenny Haldane's hard at work on Panel # 37 specs carefully poised, capturing details of that forced march ...
click to enlarge the pictures
__________________________________________________________
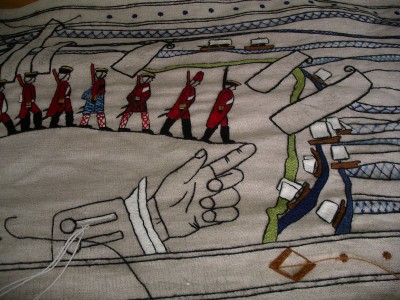
# 37. Sir John Cope makes a forced march to Aberdeen – September 4th – 11th
Cope realised as soon as he left Dalwhinnie that he had to return as swiftly as possible to the Lowlands if he was to save Edinburgh. He left Inverness on September 4th reaching Aberdeen on the 11th. The 'forced' march took him through Nairn, Elgin, Fochabers, Cullen, Banff, Turriff and Old Meldrum. Throughout this march, as had occured ever since he left Stirling, his Highlander Companies suffered desertions. Furthermore Cope was not joined by loyal Hanoverian Highland supporters as he had been led to believe he would.
Published Date: April 17th 2010
|